Fabrication & Installation Guide


Caesarstone Porcelain

Download the Fabrication
& Installation Guide


Caesarstone Porcelain Breaks the
Boundaries of Design and Material


Caesarstone Porcelain slabs break the boundaries of material, with uncompromising durability and strength. A powerful collection with a forward design that opens a whole world of possibilities and creative freedom, for both indoors and outdoors.

Please note that imperial measurements in this Guide are approximate only.

Caesarstone celebrates the unique nature of Porcelain, a material that enables, through an advanced manufacturing technique, boundary-breaking design combined with uncompromising functionality. The collection combines a spectacular variety of colours, bold designs and raw-natural textures, taking you on a creative journey that invites you to bring your personal style into the kitchen - the heart of the house.
Caesarstone's Porcelain collection ignites the imagination and redefines the boundaries of design with strong, exceptionally durable and spectacular surfaces. Each surface reflects the human fingerprint of our designers, who are inspired by the latest global colour and material trends and grant you the freedom and flexibility to design your dream space.


Strength and durability created by advanced
technology to provide maximum protection against
scratches, pressure and cracks.


Fusion of the material at a temperature of 1150°C
renders the surface resistant to extreme heat.


A variety of ground-breaking models in the world of
surfaces bring innovation that expresses strength
and passion for design.


1. Porcelain Slab Specifications


1.1 Pre-fabrication Dimensions


Caesarstone Porcelain slabs come with fiberglass mesh backing. The mesh reinforces the slab against damage from blows and falling objects, thus giving Caesarstone Porcelain slabs an advantage over slabs without mesh backing. The mesh must not be removed during the cutting, fabrication or installation process, apart from in the instances detailed in this Guide. 
The appearance of the mesh may vary between models; all mesh is of the same quality.

Caesarstone Porcelain slabs are supplied in one of two types with very slight differences in size, thickness and edge type. Care and maintenance, fabrication and installation are identical for both types.

Thickness Pre-Cutting Dimensions of Full-sized Slab Pre-Cutting Weight of Full-Sized Slab
12 mm +/- 0.5 mm 1600 x 3200 mm (63” x 126”) 150-160 kg (331-353 lb)
12.5 mm +/- 0.5 mm Min 1630 x 3250 mm, Max 1680 x 3300 mm 159-166 kg (350-366 lb)

1.2 Slab Label


Each Porcelain slab features a unique label that displays all its identifying information: barcode, model, dimensions, quality control inspection date, grade and more.

The information, recommendations, and data set forth herein are intended for use by persons with expertise, professional experience and technical skills, at their own discretion, and subject to their personal and exclusive responsibility. Caesarstone accepts no responsibility and disclaims all liability for any harmful effects that may be caused by fabrication and installation of our products.

The information and data provided in this Guide have been prepared to the best of our professional knowledge and experience, and that of our partners, based on the most common cases recorded while working with Porcelain slabs.

While working with Porcelain slabs, circumstances may arise that cannot be anticipated or addressed in advance. Therefore, the instructions provided in this Guide should be regarded solely as instructions that outline principles for working methods. Professional discretion and risk assessment must be exercised prior to any activity, a safety professional must be consulted as required, and pilot testing should be performed before any action is taken for the first time. Please contact a Caesarstone representative if clarification is required on any matter.

The suggestions and instructions contained herein do not constitute a breakdown or summary of any applicable laws, regulations, rules, directives or insurance requirements, and should not be solely relied upon. Fabricators and installers of our products must be aware of all the applicable local laws and regulations, and ensure that all Caesarstone products are used in accordance with such laws and regulations. In the event of any conflict arising between the contents of this Guide and the provisions of any law or regulation, the provisions of the relevant law or regulation must take precedence.

No guarantee or warranty of any kind, express or implied, is made of merchantability, fitness for a particular purpose, or otherwise. Caesarstone may update this Guide periodically. To ensure that you are viewing the latest version, please visit the Caesarstone website or contact your local Caesarstone representative.

504 Lumena

2. Safety Procedures for Working with Porcelain Slabs


Ensure that the work is carried out in a safe and responsible manner. You are required to know and implement all the safety instructions required by law and the regulations related to your work in addition to the guidelines provided by Caesarstone. This chapter presents a number of safety guidelines to assist you in maintaining a safe work environment.

2.1 General Safety Procedures


  • Before beginning any new work processes, conduct safety and/or occupational health
    research, follow workplace safety management procedures, and test air samples according
    to local regulations. Consult safety and occupational health professionals to ensure that
    you are compliant with applicable laws.
  • Ensure that you have the instructions for use of the equipment, raw materials, and
    machinery in your work environment. Carefully follow the instructions provided by the
    manufacturers of the machinery, raw materials, and equipment you are using. Learn the
    tools' applications, maintenance requirements, and limitations. Determine the potential
    risks that may arise from using them and implement the necessary precautions.
  • Ensure that all workers are informed of the risks involved in the work and the necessary
    precautions. Perform staff training in accordance with local regulations.
  • Ensure that machine operators have undergone the appropriate training to operate the
    machine, such as: competent person, locking up, labelling, etc.
  • All electrical tools need to comply with local regulations, particularly in respect to earthing and connection to the mains supply. A qualified electrician should be consulted if imported tools with nonstandard connections are to be employed.
  • The work environment must be kept clean, tidy and free of personnel, equipment and
    materials that are not necessary to carry out the work.
  • During installation, ensure that only the installers are present.
  • Keep children and visitors away from the work area.
  • Keep the work environment well ventilated and well lit. Please refer to the risks involved in
    working in a hazardous dust environment in section 2.2.
  • Always keep proper footing and balance. Do not bend down or stretch to reach unsafe areas.
  • Ensure that machines and blades comply with local safety regulations and have all necessary safety features.
  • Slabs may only be moved and lifted with appropriate lifting devices. Make sure that these devices are approved by a qualified inspector in accordance with local regulations.
  • Maintain a fully equipped first-aid kit on site.
  • For best and safest performance, keep tools sharp, clean and well maintained.
  • Use clamps or a vice to secure work when necessary, freeing both hands to safely operate tools.
  • Avoid wearing loose clothing, rings, bracelets, or anything else that might get caught in machinery.

Wear the following safety gear during fabrication:

  • Hair covering to contain long hair
  • Safety helmet when unloading, loading, and transporting the slab
  • A dust mask and filter suitable for the level of dust in the work environment, in accordance with all
    standards and regulations for working in a hazardous dust environment
  • Dedicated work clothing in the workplace, including non-slip, steel-capped safety shoes, in accordance with the relevant safety regulations. Store workers’ personal clothes and work clothes separately. At the end of the workday, workers must shower and change into their personal clothes.
  • Sealed safety goggles or other approved eye protection
  • Ear plugs or work earphones according to the noise level in noisy areas
  • Safety gloves for protection against chemicals, rough materials or sharp slab edges
  • In wet areas, aprons and non-slip, steel-capped rubber boots

In addition, ensure that all work is carried out in an eco-friendly manner with minimal environmental impact (remove waste, prevent air pollution, handle hazardous materials responsibly, avoid polluting the soil, etc.).

2.2 Safety Procedures in Hazardous Dust Work Environments


Porcelain slabs contain crystalline silica and other materials. The full slab composition appears in the
Caesarstone Porcelain Safety Data Sheet, which can be found on the Caesarstone web site or obtained from your distributor or Caesarstone representative. For more information please see the Good Practice Guide at mos.caesarstoneus.com.

During the cutting and fabrication stages, crystalline silica/silicon dioxide (SiO2) dust is generated, which is defined as hazardous dust by occupational health regulations. Workers who inhale this type of hazardous dust during fabrication or installation are at risk of developing silicosis (a progressive, irreversible lung disease, which causes physical disabilities and may be fatal), lung cancer, chronic obstructive pulmonary disease (COPD), and kidney disease. Some medical studies suggest that inhaling this dust in the workplace may increase the risk of developing certain autoimmune diseases. Full adherence to health and safety regulations can prevent silicosis and other health risks.

You must be familiar with the relevant local hazardous dust regulations, which determine, among other things, the maximum Permitted Exposure Level (PEL) in the workplace. You must ensure that your work environment does not have a higher PEL than is permitted by the regulations. Air monitoring must therefore be carried out in the workplace by a certified laboratory to determine the concentration of hazardous dust in the air.

We have summarised here for you the main safety guidelines for working in a hazardous dust environment:

  • Prevent the generation of hazardous dust as far as possible.
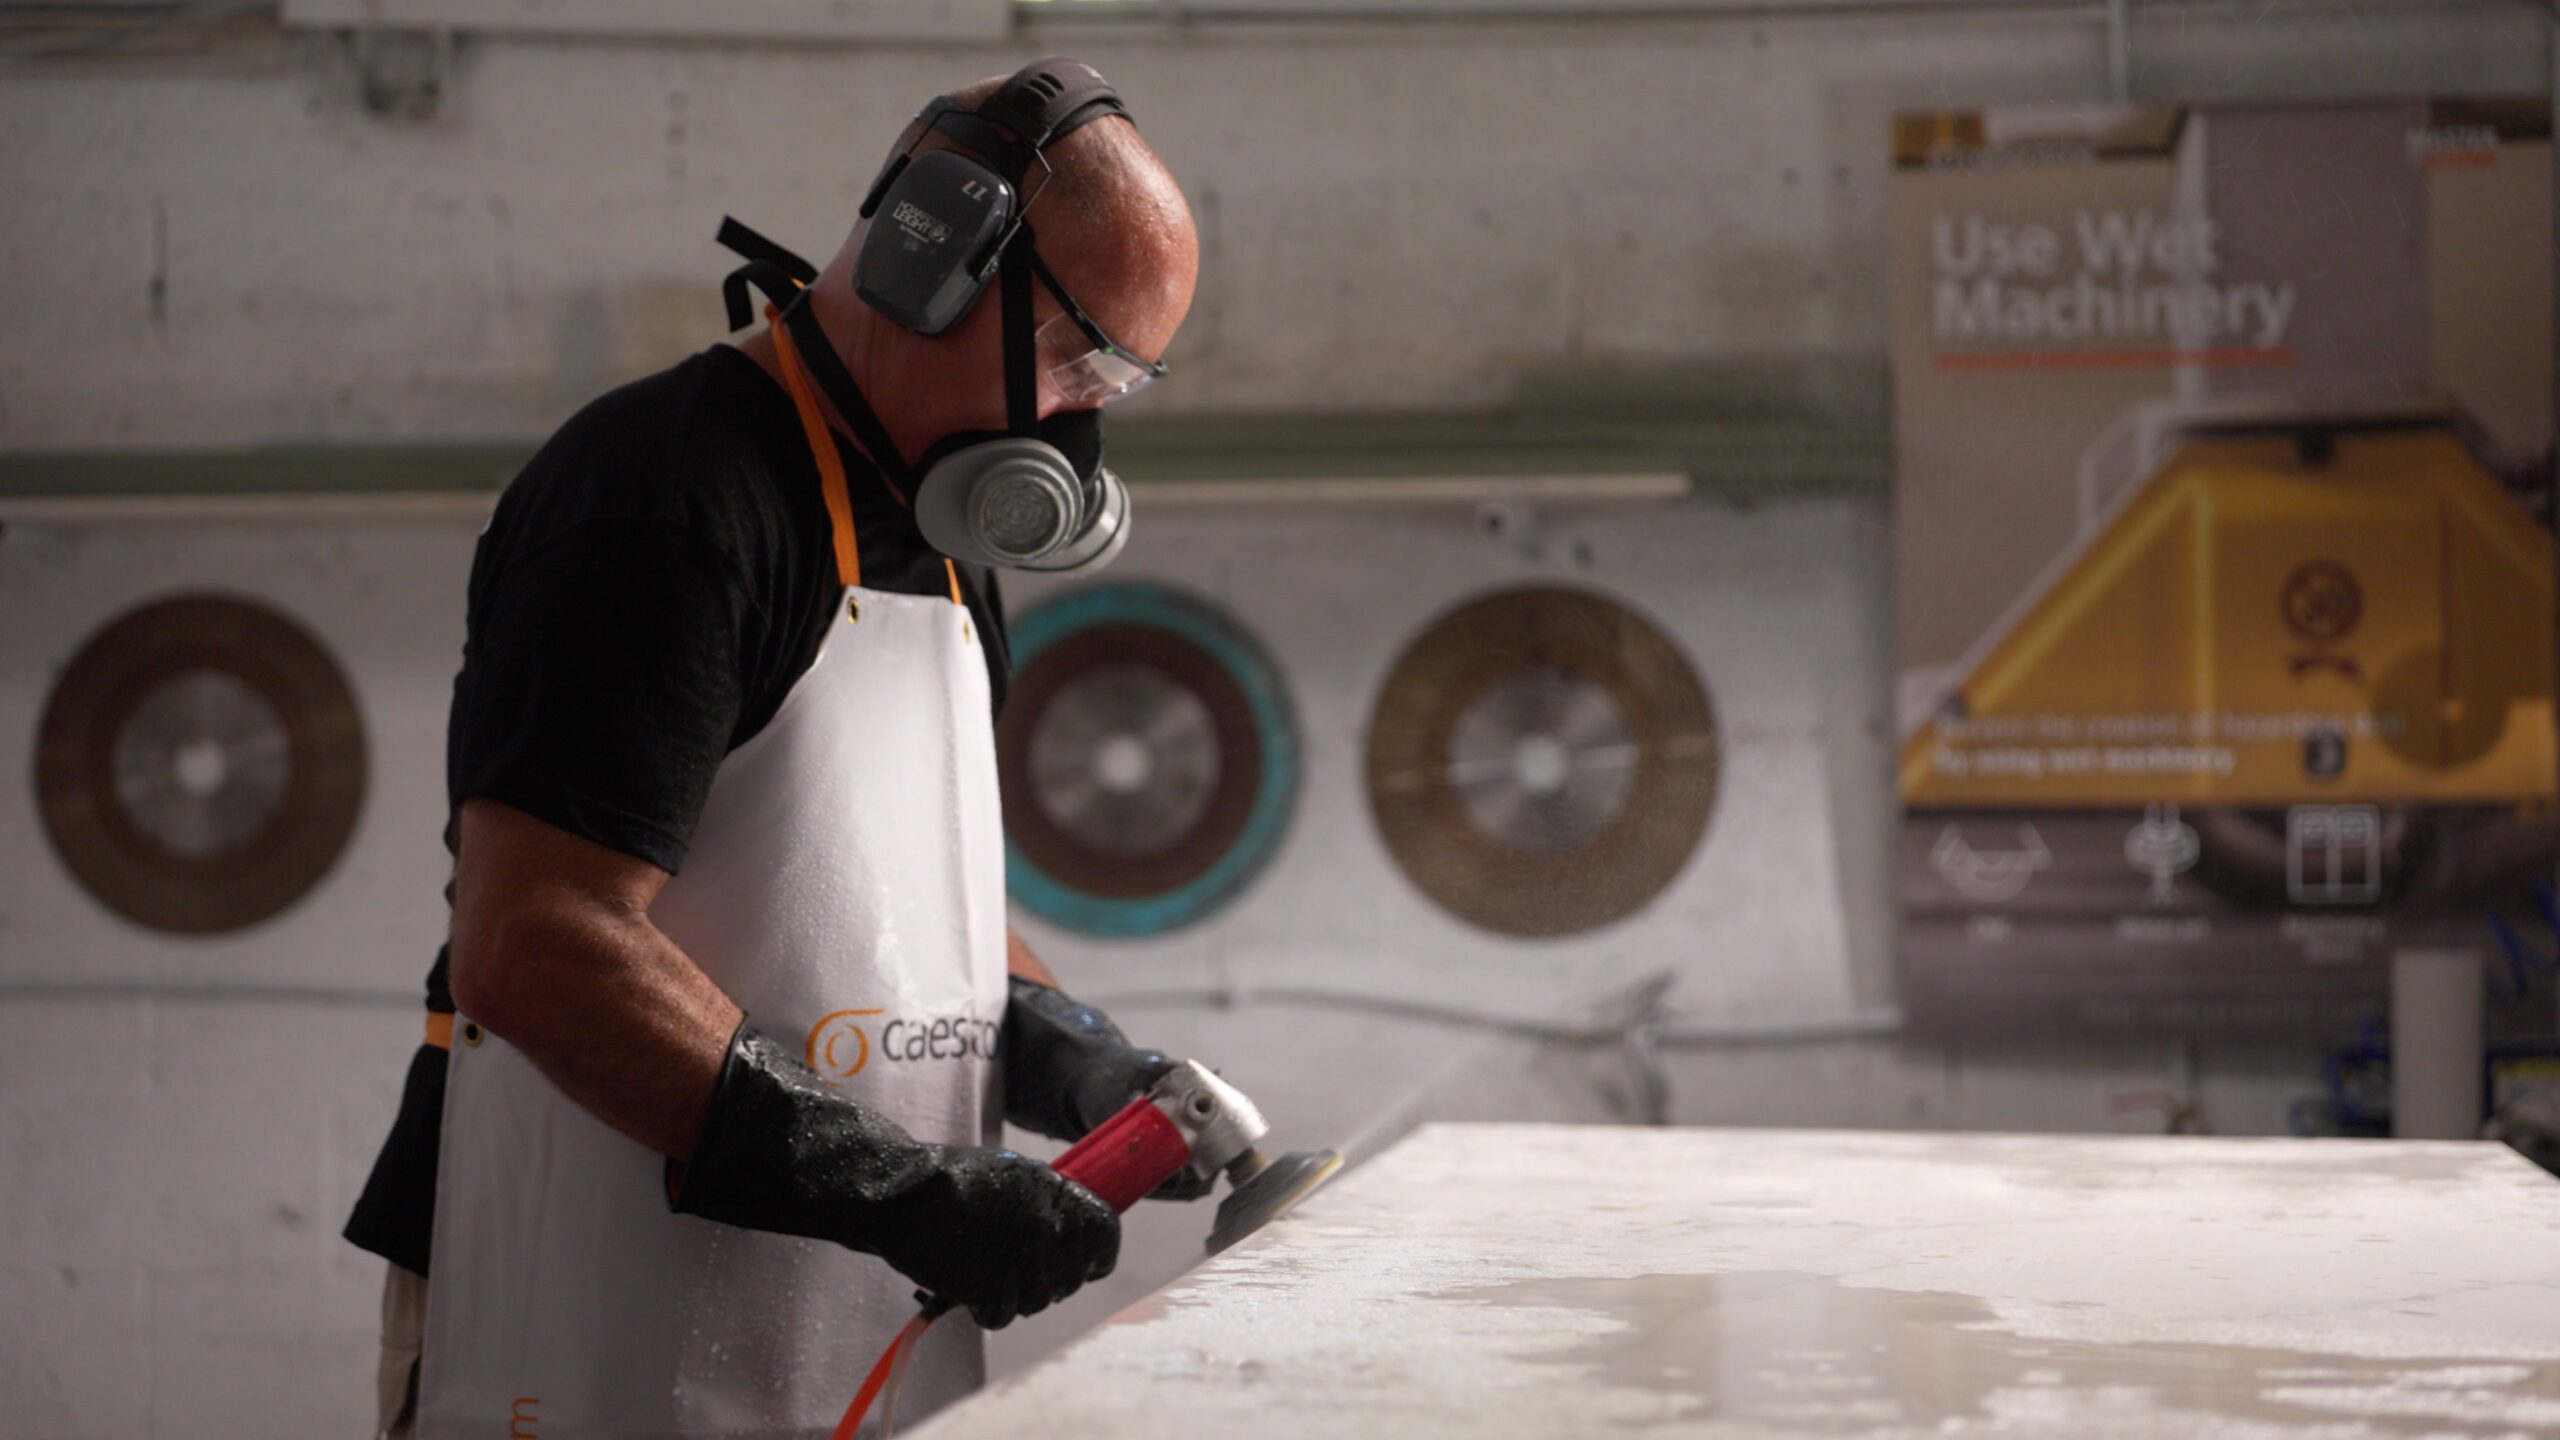
  • Use CNC machines and wet cutting and fabrication tools to minimise the release and dispersion of dust.
  • Before starting work, ensure that the dust intake, filtration and emission system is functioning correctly.
  • Consult an occupational health professional to determine the type of Respiratory Protective Equipment (dust mask and filter) required according to the airborne dust concentration in your work environment.
  • Provide all workers exposed to hazardous dust with the appropriate Personal Protective Equipment (PPE), including a dust mask and filter suitable for the level of dust in the work environment, protective clothing, safety gloves, safety goggles, safety shoes and hair covering. It is compulsory for all workers to use this equipment.
  • Ensure that all hazardous materials, equipment, and work processes are marked with clear, appropriate labels or warning signs. Install instruction signs for the use of PPE. Make sure that these signs provide explanations in a language understood by the workers. If any workers do not understand the language on the signs, ensure that they fully understand the instructions.
  • Clean the work environment, floors, and all exposed surfaces at least daily with wet cleaning methods or with a vacuum cleaner with a HEPA filter (a special filter that achieves total filtration).
  • Never use compressed air or a broom to clean work clothes, machines or floors.
  • When performing maintenance and cleaning the machines, always wear protective clothing, a dust mask, safety gloves and safety goggles.
  • In work environments containing hazardous dust, launder all workers’ work clothes and provide them with clean clothes daily. Explain the importance of separating work clothes from clean clothes. Work clothes and shoes must be left at the workplace, and never removed from the plant.
  • At the end of the workday, workers must shower and change into their personal clothes, which have been stored in a dust-free place.
  • Eating, drinking and smoking are only permitted in designated areas not exposed to hazardous dust.
  • Smokers and people suffering from respiratory disorders may be more sensitive to the effects of hazardous dust. Arrange appropriate training sessions for all workers about the health risks caused by smoking combined with working in a hazardous dust environment and encourage workers to quit smoking.
  • Carry out medical monitoring according to your local regulations. Consult occupational health and safety professionals to determine the specific requirements of your and your employees’ medical supervision plan.
  • Conduct health and safety training for all workers on a regular basis.

Please note that additional risks not mentioned in this section may be present in the work environment. Therefore, the business owner and employer must assess all the risks in the workplace, establish safety and occupational health instructions, and ensure that such instructions are fully implemented in the workplace in accordance with all applicable laws and regulations. This document does not constitute professional, medical, health or legal advice of any kind. As professionals, fabricators must be familiar with and implement all the relevant professional and safety requirements related to their work. Plant owners and managers are fully responsible for the health and safety of their employees. This document is not intended to replace your need to consult with health and safety professionals regarding your specific workplace conditions.

3. Transportation, Storage & Handling of Porcelain Slabs


Porcelain slabs are strong and durable. However, careless handling, transportation or storage can cause unnecessary and costly damage. A safety professional should be consulted regarding loading, unloading and handling Porcelain slabs in your work environment.

 Personal Protective Equipment such as safety shoes, helmet and gloves must be used when transporting, storing and handling Porcelain slabs, according to your local regulations.


Below are a number of safety rules that will help you take good care of the Caesarstone Porcelain slabs in your plant.

3.1 Lifting Bundles of Slabs (8-10
Slabs) and Up to 10 Individual Slabs


In some cases, Porcelain slabs will be delivered in bundles of 8-10 slabs. The best way to load, unload or transport slabs from the storage device or truck is by crane or lifting beam with straps that can carry the weight of 10 slabs (about 1600 kg/3527 lb).


  • Do not use metal chains or cables to handle the slabs.


 Caution! Because slabs may come loose,
keep a safe distance from the forklift or
lifting device while lifting or transporting the
slabs. Keep employees and visitors away from
the forklift or lifting device.


3.2 Lifting & Transporting an Individual Slab or
Up to 4 Individual Slabs


When loading, unloading or transporting an individual slab or up to 4 individual slabs from the storage device, truck or in the fabricating plant, follow the guidelines below:

  • Load A-frames symmetrically, one slab at a time from each side, to prevent the A-frame from
    overturning. Unload on straight and even ground.
  • Use a forklift or lifting device with a clamp that enables lifting of a single slab or a number of slabs together, or a vacuum device suitable for transporting a single slab. Check that the device’s maximum permitted load according to the manufacturer’s instructions is suitable for the weight of a single slab or the combined weight of up to 4 slabs that you intend to lift and that the equipment is in good order.
  • Ensure that the lifting clamp is approved by a qualified tester and operated according to the manufacturer’s instructions (maximum carrying weight, clamped area, etc.). In certain weather conditions the product may be more slippery than usual, and it is therefore important to ensure that the rubber pads on the clamp are replaced according to the manufacturer’s instructions.
  • Use only plastic or canvas straps suitable for the slab weight, not metal chains.


Caution! Take into account before loading, unloading and transporting, that extreme weather conditions such as heavy rains and winds can shake the slabs and cause them to fall or damage vehicles or people. It is therefore essential to carry out risk assessment before loading, unloading and transporting slabs and to take the necessary precautions, including working under cover and distancing people from the working area.

3.3 Storage


Porcelain slabs should be stored in A-frames or storage racks suitable for large Porcelain slabs.

The guidelines below apply to all storage methods:

  • Ensure that no employees are in the vicinity of the storage device while unloading or loading the slabs.
  • A structural engineer or authorised inspector must periodically test the strength and stability of the storage system (racks and A-frames).
  • Place wooden, rubber, or plastic buffers on the base and upright of the storage device to prevent slab edges from chipping as a result of contact with the metal.
  • To prevent breakage or damage, do not place whole slabs on parts of slabs when storing and handling.
  • Arrange the slabs face-to-back with no gaps, in a manner that allows easy identification of the colour and batch number.

Please note! Porcelain slabs are heavy and likely to cause serious injury if they are not
correctly stored, transported and handled. All stored slabs must be properly secured to
ensure a safe working environment.

Key Points for Storing & Transporting Slabs in A frames

  • Store Porcelain slabs on suitable A-frames or racks.
  • Position the A-frame on even, level ground to prevent overturning during loading and unloading.
  • Load and unload A-frames symmetrically, one slab at a time from each side, to prevent the A-frame from overturning.
  • Do not “leaf” through the slabs while they are stored on A-frames to prevent the slabs from falling and causing serious damage.
  • Ensure that the slabs rest entirely on the horizontal base beam. If they do not, uneven pressure on the beam may cause the A-frame to move and the slabs to fall.
  • When transporting the slabs on A-frames:

- Lift the A-frame by its side grip points with a forklift on the wide side only if there is a dedicated opening for forks on the A-frame base.

- Use a suitable forklift with lifting capacity for all the slabs and the A-frame.

- Protect the exposed edges of large slabs that extend beyond the A-frame during loading and transportation.

  • Securely fasten the slabs to the A-frame with plastic or canvas straps (not metal chains) before each transportation, even when moving a single slab.
  • Place a protective shield of rubber, plastic or wood on the base beam and upright of the A-frame to prevent damage to the slabs.

Key Points for Storing Slabs on Racks


Porcelain slabs can also be stored in racks suitable for large Porcelain slabs:

  • The rack must have at least two support posts at a 7° angle from the vertical. The posts must be 130 cm (51”) high, with a distance between them of 160-170 cm (63-67”).
  • Place a plastic shield at the top of each support post to prevent scratches and damage to the slabs. Place a rubber or wooden shield on the horizontal base beam to prevent breakages to the bottom of the slab.
  • Porcelain slabs may warp slightly if stored vertically but will then straighten out when laid on a horizontal surface.


When leafing through the slabs on the rack:

  • Ensure that each slab is positioned between two support posts.
  • Use suitable work gloves and take care not to trap your fingers between the slabs.
  • Do not use a screwdriver or any other sharp tool to leaf through the slabs.
  • Leafing must be performed by two people simultaneously, one on each side.

3.4 Transportation


Porcelain slabs are large and heavy and must therefore be transported safely. Load the slabs onto an appropriate vehicle with a securely attached A-frame suitable for the size and weight of the slabs. Follow the safety rules below:


  • Arrange the slabs for transportation on the stand face-to-back. Place pieces with cut-outs in the middle of the stack between whole pieces for protection.
  • Load and unload symmetrically by adding or removing one slab from each side in turn to maintain balance and prevent the A-frame from overturning during loading, unloading, or transportation. Ensure that the truck is on a stable, level surface.
  • After loading, securely fasten the stack or individual slabs to prevent them from coming loose.
  • Fasten the entire stack to the body of the vehicle.

4. Pre-fabrication Visual Inspection


Porcelain slabs are manufactured in strict adherence to Caesarstone‘s stringent quality assurance procedures. That said, they may sometimes have imperfections or flaws. Therefore, before starting the fabrication process, it is imperative to remove the plastic coating and perform a visual inspection from several angles for the following possible imperfections:


  • Cracks, holes or blemishes
  • Colour or gloss inconsistency within the slab
  • Thickness inconsistency (tolerance +/- 0.5 mm)
  • Warping (tolerance +/- 2 mm of the slab length or width) when checked on a flat surface

As Porcelain slabs are manufactured from natural materials there may be slight variations in the shade and texture of the slab. At the end of the production process a stringent quality assurance process takes place in which the various shades are classified and marked. It is therefore important to check colour and gloss consistency between two slabs intended for the same project.

If you find an imperfection in the slab, report it to the distributor or a Caesarstone representative prior to fabrication. Caesarstone will not consider any claims relating to the condition of the slab after it has been fabricated and/ or installed, subject to the terms of the Caesarstone warranty which can be found on the Caesarstone website.

5. Working with Porcelain Slabs


In order to achieve high quality results and protect your workers, perform all cutting and fabrication with diamond blades suitable for work with Porcelain slabs, using manual and automated water-based machines.

At the start of each job, check that the equipment is in good working order. Ensure that the work surface of the machine on which the slab is placed is solid, stable, level, whole, free of defects and without residue from any previous task.

Experience working with Porcelain slabs enables high quality, professional and efficient results, and can prevent unnecessary breakages. Therefore, before starting to work with Caesarstone Porcelain, we recommend that all workers do some practice work with Porcelain slabs.

5.1 Types of Machinery for Cutting Porcelain Slabs


CNC Machines and Bridge Saws
CNC machines and bridge saws are among the most effective cutting tools for Porcelain slabs. Strict adherence to correct work procedures will enable precise cutting, high-quality work and prevent damage to the slab.


  • Cut the slab only in the direction that the blade is moving. Do not cut the slab from inside the
    material; start entering the slab from outside the material and finish exiting the slab outside the
    material.
  • Using the saw at a slow feed rate enables higher cutting quality and a smaller bevelled edge
    finish.
  • When entering and exiting the slab, the saw feed rate must be 50% of the recommended speed
    according to the blade diameter as shown in the tables below.
  • The transition to the recommended saw feed rate (from 50% to 100%) must take place only
    once the entire blade is inside the slab. Reduce the saw speed to 50% again a few centimetres
    before the blade starts to exit the slab.
  • Use plenty of water when cutting to ensure efficient, high-quality work and prevent unnecessary
    wear and generation of dust.
  • To prevent damage to the blade or the work surface underneath the Porcelain slab, do not let
    the blade protrude more than 2 mm (1/10”) underneath the slab.
  • For optimal results, reduce vibration generated by the cutting to a minimum.
  • Before first use, and every few cuts thereafter, sharpen the blade with an aluminium oxide or
    quartz sharpening block.

Ensure that the blade exits the slab before ending the cut.

Below are the recommended blade RPM and saw feed rates according to the blade diameter.

Straight Cuts


Blade diameter (mm) RPM Recommended saw feed rate (mm/min) Saw feed rate on entering and exiting slab
350 2,200-2,400 700-1,000 50%
400 1,900-2,100 700-1,000 50%
450 1,600-1,800 700-1,000 50%

Miter Cuts (45°)


Blade diameter (mm) RPM Recommended saw feed rate (mm/min) Saw feed rate on entering and exiting slab
350 2,200-2,400 300-500 50%
400 1,900-2,100 300-500 50%
450 1,600-1,800 300-500 50%

Recommended Steps for Cutting:
1. Prepare the slab by pre-cutting its 4 sides (as detailed in section 5.2).
2. Drill holes for cut-out corners.
3. Make straight cuts.


Recommended Steps for Creating Sink and Cooktop/Hob Cut-Outs

  • Drill the cut-out corners with the cutting machine cup drill to a depth of 8 mm (5/16”). Use a suitable diamond cup drill for Porcelain.
  • Cut a frame connecting the drilled corners to a depth of 8 mm (5/16”).
  • Transfer the slab to the manual worktable.
  • Complete the cutting with a manual tool until the piece disconnects.


Waterjet Cutter
Porcelain slabs can also be cut easily and efficiently with a waterjet.

Just before starting to cut, it’s important to:

  • check that the metal support mesh is intact and flat
  • check that the slab is firmly secured to the surface to prevent movement during fabrication that may impair the cutting quality
  • prepare the slab for work by pre-cutting the 4 sides (as detailed in section 5.2)


After each stage of fabrication, before the slab is dry, rinse the surface with clean water.

  • To create a cut-out in the slab, start by drilling a hole in the middle of the planned cut-out, and then proceed towards its edge.
  • Maintain an internal corner radius of at least 10 mm (3/8”).
  • When starting work, it is important to ensure the correct starting pressure and abrasion, as detailed in the table below.

CNC Milling Machine
Porcelain slabs can also be cut with a CNC milling machine, designed also to create cut-outs for sinks and cooktops/hobs, edge profiles, holes, rounded cuts and more.

Cutting and fabrication processes are performed with different fabrication heads. It is important to check that these heads are suitable for working with Porcelain slabs.


Positioning of Suction Cups
Correct positioning of suction cups that hold the slab in place is imperative for successful cutting. It is
therefore important to ensure that:


  • the slab is gripped correctly and completely by the suction cups so that it does not move and get damaged
  • the suction cups are evenly distributed across the whole surface for full support
  • the suction cups are positioned close to the cutting area and underneath the parts to be removed
  • no bending occurs during cutting between the slab and the part to be removed to prevent cracks or breaks


Special clamps may be used instead of suction cups. Bear in mind that it is not possible to fabricate the parts to which the clamps are connected.

Types of Fabrication

Below are the working data for cutting and fabricating Porcelain slabs with a CNC milling machine.

Type of Fabrication RPM Fabrication Head Feed Rate (mm/min)
Holes (35 mm/1 3/8” diameter) 1,800-2,200 20-30
Cutting 3,000-4,000 100-200
Surface indentation 5,000-7,000 150-250
Bevels 5,000-7,000 1,000-2,000
Polishing edge profiles 3,000-5,500 1,000-3,000
Polishing slab edges 3,000-5,500 1,500-3,000

5.2 Preparing the Slab for Work


Before starting to fabricate the slab, it is necessary to cut the 4 sides of the perimeter at a distance of 20-30 mm (3/4"-1 1/4") from the edges to release pressure, or to trim the slab to a perfect rectangle.

5.3 Key Points for Cutting


To prevent breakages during fabrication, plan the cut-outs to be performed at the centre of the cutting table, not near the edge.

When planning cutting of a Porcelain slab as a kitchen worktop, it is important to maintain a distance of at least 50 mm (2”) between a cutout and the external edge; and between a sink and cooktop/hob cutout. Maintain a distance of 65 mm between a cooktop/hob cutout and a backsplash. 


Create cut-outs and inside corners with a radius of at least 10 mm (3/8”) in order to spread pressure evenly across the slab and prevent cracks.

5.4 Transporting Slabs After Cutting


Slabs with cut-outs or holes are more susceptible to breakage. Therefore, after fabrication and when the slab is moved from the fabrication machine to the worktable, it must be handled with extreme care to prevent breaks and other damage.

  • Use a lifting device with suction cups only if
    there are enough grip points on the slab.
  • Avoid bending the fabricated slab.


Alternatively, the slab can be transported
vertically with the cut-outs at the top. Take
care to avoid twisting the slab. 


5.5 L-Shaped Worktops and Joins


As a general rule, when there is a change of direction in the slab make only straight joins, not diagonal or rounded joins. Use diagonal joins only when necessary for continuation of veins or a pattern in the slab

A rounded corner may be fabricated in a single thickness slab where there is a corner/niche no greater than 70 mm (2 3/4”), and it is not connected to another slab.

A 90° corner may be created if the slab has a laminated edge profile.

In diagonal corner worktops a join must be
created in one of the corners. If the worktop
is single thickness, create a radius of at least 35
mm (1 3/8”) in the other corner.

For indents from the edge of a slab, for
example around a pillar: for slab lengths up to
1600 mm (63”), drill holes in the 2 corners; for
slab lengths over 1600 mm, drill a hole in one
corner and create a straight join from the other.

  • When installing the worktop, fill the seams
    between the slabs with adhesive specifically for
    Porcelain that matches the worktop in colour, with properties suitable for the installation environment (indoors and outdoors).
  • If the slabs are inconsistent in appearance, check the pieces to be joined in advance to achieve the best possible match.
  • Clean each slab piece with clean water at the end of each fabrication stage before it dries.

5.6 Installing Sinks and Cooktops/Hobs


Use of Porcelain slabs as kitchen worktops allows for design flexibility, with a wide range of installation options for sinks and cooktops/hobs

General Guidelines for Installing Sinks and Cooktops/Hobs

  • Fabricate cut-outs in accordance with the sink manufacturer/supplier’s technical guidelines and restrictions.
  • Leave 2 mm (1/10”) between the sink or cooktop/hob and the Porcelain worktop for thermal expansion.
  • When installing a sink, seal the gap between the sink and the worktop with silicone, an adhesive seal, or a similar product. If using silicone, apply masking tape to the worktop around the sink cut-out to prevent staining.
  • Seal the cooktop/hob to the worktop with the designated adhesive seal that was supplied with it.
  • Create cut-out corners of at least 10 mm (3/8”) radius for sinks and cooktops/hobs.
  • Sinks built of Caesarstone Porcelain must only be fitted by undermount installation, not integral installation. Built sinks are not covered by the Caesarstone warranty.
  • Do not perform flush installation for cooktops/hobs.

Recommendation: Support sinks with two support bars connected to the cabinet carcass to prevent stress on the worktop.

Overmount Sink and Cooktop/Hob Installation

In this installation, the lip of the sink or cooktop rests on top of the worktop. It is important to leave 2 mm (1/10”) between the edge of the installed sink/cooktop and the worktop.

Flush Stainless Steel Sink Installation

In flush installation the sink is installed in an indentation of a few millimetres in the worktop. The indentation must be no deeper than 7 mm. The sink does not protrude above the worktop.

Flush Sink Installation

In flush installation, the sink is installed almost or completely flush with the worktop by a method resembling fitting a cone into a cone. The lip of the sink is slightly wider at its top edge than at its bottom edge.

Fabricate the cut-out at a slight angle to create a cone shape, so that the top of the cut-out is wider than the bottom of the cut-out. The sink can then be slotted into the cut-out. The size of the cut-out determines the position of the sink relative to the worktop.

Undermount Sink Installation

The sink is installed underneath the worktop. Since there are no protrusions to accumulate dirt, cleaning the worktop is fast and easy.

First, fabricate the cut-out 10 mm (3/8”) smaller than the sink so that the join between the sink and the worktop is not visible. Next, round or bevel the edge, then slightly polish the internal edges of the cut-out. This type of installation guarantees a uniform worktop as the sink edges are not visible.

In this installation the sink must be supported from underneath by support bars to prevent it detaching

5.7 Edge Profiles


Edge profiles can be fabricated automatically (with, e.g., a CNC, CNC milling machine, bridge saw) or manually.


Single-thickness Edge Profiles

A wide variety of single-thickness edge profiles can be created in Porcelain slabs. These finishes expose the body of the slab, which differs in colour and design from the surface of the slab.

  • Manually polish the edge with diamond or ceramic polishing pads for Porcelain progressively, from coarse to fine.
  • Create a minimum 3 mm (1/8”) bevel to ensure long-term durability of the edge profile.
  • After fabricating with a CNC milling machine, the edge profile can be polished with a manual polishing tool with diamond polishing pads for Porcelain.

Use these finishes also for undermount sink cut-outs.

Removing the Edges of the Fiberglass Mesh Backing

To ensure that the fiberglass mesh backing on the slab is not visible, remove 50 mm (2”) from the front of the worktop or from the edge of the sink cut-out, using an angle grinder with a diamond polishing pad.


Drip groove

The purpose of a drip groove is to prevent liquid that runs over the worktop edge from dripping onto the cabinet. Cut a groove 3 mm (1/8”) deep under the whole length of the worktop, the thickness of the blade, approximately 10 mm (3/8”) from the front of the worktop.

Mitre Cut

Mitre edges create the illusion that the worktop is thicker than the slab. The colour and design of the vertical edge are identical to the horizontal surface.

To create a mitre edge, set the fabrication machine to cut the slab at a 45° angle and join the two pieces. The mitre edge should be from the area adjacent to the edge to which it will be attached for pattern continuity.

After connecting the pieces, create a bevel on the new upper edge.


Adhesives

Joining the edges properly and professionally will give the worktop a uniform look and will make it less prone to chipping over time.

  • Use adhesive specifically for Porcelain for best results when joining mitre edges.
  • Use adhesive the same colour as the worktop for an optimal finish.
  • Allow the adhesive cure time as specified in the manufacturer’s instructions for a strong, high-quality join.

Support Strips

Glue support strips of marble, natural stone, granite, Wedi or birch wood to the underside of the edge in order to raise and support the edge where a laminated edge would hinder the opening of the cabinet doors. This also strengthens the edge.

Whole Length Front and Back
Glue the support strips along the whole
length of the front and back of the cabinet.

Height and Width
The strips should be a minimum
of 70 mm (2 3/4") wide, and the same
height as the part of the lamination strip
that protrudes underneath the slab.

Align Joins
The support strip should be the same length as the piece of surface to which it is attached. Joins in support strips will, therefore, be aligned with the surface joins.

45° Joins
Partial support strips are not recommended as they create stress points that could lead to cracking on the worktop above. If, however it is necessary to create support strips out of more than one piece, make a 45° angle diagonal join and cut support pieces on outside corners at a 45° angle; see below.

5.8 Cleaning After Fabrication & Installation


It is important to thoroughly clean the slab both after fabrication in the plant and after installation in the customer’s home. If this is not done properly the slab may be damaged and its appearance affected over the long term.


Cleaning Instructions

  • Clean the slab with plenty of water to remove fabrication debris after each use of blades, a
    waterjet, or a CNC machine. Afterwards, wipe the slab with a squeegee, and then dry it.
  • Do not store a fabricated slab wet.
  • Use paper masking tape on the edges of seams between two pieces of the worktop, and between
    the worktop and the backsplash to prevent staining by the adhesive or silicone.
  • Clean any excess dry adhesive from the surface with a soft cloth soaked in acetone or solvent.
    Do not use the same cloth to continue cleaning the surface – use a new, clean cloth.
    This is particularly important for dark slabs.

 Do not apply material of any kind to the worktop that could affect its appearance or performance, such as sealer, wax or oils.

 The slab should be clean when it is brought to the customer’s home for installation. After installation, clean the slab with water and a neutral detergent on a damp sponge or cloth.

 Before cleaning, read the full Care & Maintenance instructions in section 7.

5.9 Worktop Supports


Worktops with single-thickness edge profiles may be installed only on cabinets with a full wooden subtop apart from sink or cooktop cut-outs. In this case place the worktop on top of the cabinets.

 Caesarstone strongly recommends using a substrate with high moisture resistance such as construction grade C-D plywood or HMR (high moisture resistance) plywood.

Worktops with laminated edge profiles may also be installed when the cabinet does not have a full subtop. In this case, provide support in one of the following ways:

  • Support strips 70 mm (2 3/4”) wide on the
    worktop perimeter, as well as support
    every 600 mm (24”), and at every join
    between the kitchen cabinets.


  • Support strips 70 mm (2 3/4”) wide on the
    worktop perimeter as well as a support
    panel beneath the entire remaining surface
    (e.g., a Wedi panel).


Note: Support strips must be made of granite,
natural stone, porcelain or birch wood.
Do not use engineered quartz as support strips


Caesarstone Porcelain slabs are also suitable as worktops for outdoor kitchens, and require minimal maintenance.

In addition to the instructions for installing an indoor kitchen, please follow the instructions below.

  • The worktop must be installed on a stable, uniform, level base such as concrete or bricks.
  • Use adhesives and sealers suitable for outdoor use that do not yellow over time.
  • If a grill unit is added between parts of the worktop:
    - Remove the fiberglass mesh backing from the worktop to a distance of 100 mm (4”) from the grill with an angle grinder and polishing pad.
    - Leave a 10 mm (3/8”) gap between the worktop and the grill and fill it with flexible, heat-resistant, thermal insulation material.
    - Create straight joins behind the grill.
    - Maintain a distance of 100 mm (4”) between the grill and wall/backsplash if there is one.
    - Do not completely surround the grill with the surface – at least one side must be open.

5.11 Fabricating and Installing Overhangs/Islands


Creating overhangs that extend past the kitchen cabinets or island is entirely possible with Porcelain slabs.

We recommend following the guidelines below to achieve a sturdy, stable and durable overhang:

 For all installations the unsupported overhang must be no greater than 1/3 of the complete surface depth.

  • An unsupported overhang on only one side of an island can extend up to 300 mm (12”) beyond the supported surface, provided it is no greater than 1/3 of the complete surface depth.
  • An unsupported overhang on two or three sides of an island can extend up to 250 mm (10”) beyond the supported surface, provided it is no greater than 1/3 of the complete surface depth or width.

  • Overhangs longer than 300 mm (12”) require support.

When support is necessary, use non-flexible material such as Wedi, birch, or a support construction.

The fabricator will be responsible for determining the required support for the overhang.


 If a Porcelain panel is used as vertical support from the end of the overhang to the floor, and there is no additional support, the panel must be made of two Porcelain slabs (12 mm thickness) joined back-to-back. Do not use only one slab for vertical support.

  • For an island with exposed Porcelain side panels (up to 300 mm/12”) attached to the cabinet, the fiberglass mesh backing can be removed with an angle grinder for a smoother appearance. Please note that Caesarstone does not provide warranty for the appearance of the back of the slab.

 Do not remove the mesh backing from the underside of the overhang.

413 White Ciment

6. Transporting & Installing Fabricated Surfaces


When handling, transporting and installing fabricated slabs, take care not to bend, twist or damage the slab, especially on the edges.

When installing the finished product workers must use Personal Protective Equipment: safety goggles, safety shoes, suitable gloves and, if dust is created, Respiratory Protective Equipment and a suitable mask and filter.

6.1 Loading & Transportation


  • Handle fabricated Porcelain slabs vertically, with the cut-outs at the top.
  • It is recommended to use devices designed to support and reinforce the slabs to prevent warping and breakage.
  • Ensure that the transportation vehicle and stand are the correct sizes for transporting slabs and have slab protection pads.
  • Protect the slab edges with rubber sponge or polystyrene corner protectors.
  • Symmetrical loading and unloading: Add or remove one slab at a time from each side to maintain balance and prevent the frame from overturning during loading, unloading and transportation.
  • Arrange the fabricated slabs on the transportation vehicle face-to-back with a thin foam buffer between them, without any gaps. Each piece must be fully supported by the adjacent piece.
  • To prevent the fabricated slabs from coming loose and falling after loading, fasten the fabricated pieces securely to the stand with plastic or canvas straps only, not metal chains.
  • When transferring the slab from the vehicle to the customer’s home, take great care to avoid harming people, the slab or anything else in the work area.

6.2 Checking Kitchen Cabinets Before Installation


  • Check that the base for the worktop is completely flat, level, strong and stable, to ensure that the worktop will be properly supported in the long term.
  • Ensure that the front and back legs of the cabinets are sturdy and in full contact with the floor.
  • Any cracks that appear as a result of uneven support or cabinet subsidence will not be considered a product defect.
  • At the installation site, move the slab vertically with the cut-outs at the top.
  • To minimize the risk of breaking during installation, it is recommended to support the slab with specialized support accessories.
  • To place the slab on the cabinets, lean it against the side of the cabinets and slide it up to its final
    position supported by the cabinets. Fix the surface to the cabinets with silicone at several points.

6.3 Straight Seams


The beauty and durability of the worktop depend largely on neat, clean, successful seams. Correct seaming will give the worktop a uniform appearance and maintain it in good condition over the long term.

  • Clean the seam of dust and debris.
  • Place paper masking tape on both sides of the seam to prevent staining.
  • Place a layer of paper on the cabinet underneath the seam to prevent the adhesive seeping out and sticking the worktop to the cabinet.
  • Use adhesive specifically for Porcelain that matches the worktop in colour, with properties suitable for the installation environment (indoors and outdoors).
  • Prepare the adhesive according to the colour of the worktop. If necessary, the adhesive can be mixed with pigments to achieve the required shade. It is recommended to add transparent adhesive to the Porcelain adhesive to reinforce the seam.
  • Carefully follow the manufacturer’s instructions regarding the method of adhesion and curing times.
  • Spread a generous amount of adhesive on both edges of the seam.
  • Remove installation aids and excess adhesive after the adhesive is completely dry.
  • Clean the worktop with acetone on a clean cloth, then rinse the worktop with plenty of water.
  • Use suitable protective equipment while working with adhesives according to the manufacturer’s instructions.

 Important! Do not polish seams in Porcelain worktops under any circumstances as this will damage the texture and appearance.

6.4 Connecting the Worktop to the Wall


  • Install the worktop with a gap of 2-3 mm (1/10”) from the wall.
  • Clean the gap between the worktop and the wall.
  • Spread a generous amount of silicone in the gap to prevent water from entering the cabinets.

6.5 Treating Slab Edges After Installation


After cutting, the exposed slab edges may be more sensitive to staining. It is therefore recommended to apply a layer of transparent, protective wax on visible, exposed edges such as worktop edges and sink openings. Apply the wax according to the manufacturer’s instructions.

6.6 Finishing Touches


  • Once installation is complete, ensure that the worktop and work area are clean and tidy.
  • If further work is to be performed at the site following the installation, ensure that the worktop is properly protected by covering it completely with corrugated cardboard or another protective material.
  • Make the customer aware that other tradesmen must not stand on the new worktop or use it as a workbench.
  • It is recommended to install the worktop after all other tradesmen have finished their work at the site.
  • Give the customer a detailed explanation of how to maintain and care for the worktop, as well as the counterfoil for the warranty certificate, with all the relevant details. The customer should also sign to confirm that they have received the worktop and that it has been installed to their satisfaction.
  • Naturally, you should always leave the installation site clean after your work is completed.

6.7 Repairs


Porcelain slabs are strong and durable, but if breaks occur on corners or edges, they cannot be perfectly repaired or disguised.

A break on a corner can be repaired with a colour matched two-part epoxy adhesive. However, it is important to note that the properties and appearance of the slab after such a repair may differ from the original slab.

7. Care & Maintenance


First Cleaning After Installation

  • Clean the whole surface thoroughly after installation with soapy water on a cloth or non-abrasive scourer.
  • Dry the surface completely with paper towels.

Daily Maintenance

  • We recommend cleaning the surface daily with soapy water or a mild detergent such as dishwashing liquid on a microfiber cloth or non-abrasive scourer.
  • Remove stains as soon as possible for easiest cleaning and most effective, immediate results.
  • It is important to completely wash cleaning material residue off the surface and dry thoroughly with paper towels to prevent build-up of limescale.

Heat Resistance

  • Cookware straight from the oven or cooktop may be placed directly on Porcelain countertops. However, devices that emit constant heat over a long period of time should be placed on an insulated countertop mat and not directly on Porcelain countertops.

Stubborn Stains - Recommended Cleaning Materials

  • For stubborn stains, whether they are resistant to mild detergent, or due to the stains being left on the surface for a long time, we recommend cleaning the entire surface with the following cleaning materials: Astonish® Cream Cleaner; Dettol Power and Pure Kitchen Spray; Cillit Bang Power Cleaner Bleach & Hygiene; or a magic sponge eraser.
  • For limescale removal, we recommend using Dettol Power and Pure Kitchen Spray, or Cillit Bang Power Cleaner Bleach & Hygiene.
  • Always use cleaning materials according to the manufacturer’s instructions.
  • After cleaning, rinse the surface with plenty of water and dry thoroughly with paper towels.

How to Take Long-term Care of Your Porcelain Surface

  • Do not use hydrofluoric acid or materials containing it.
  • Before using any new cleaning material, check on a small, inconspicuous area that it is effective and does not damage the surface.
  • After using cleaning material, it is important to thoroughly remove any residue with water.
  • It is important to immediately wipe up liquids spilled on the surface for ease of stain removal.
  • Do not use oil-based cleaning or polishing materials as these can leave an oily film on the surface and make it more sensitive to staining.
  • If the surface comes into contact with any products that might damage it, rinse immediately with plenty of water.
  • Carefully scrape off dried materials such as food, gum or nail polish with a putty knife and then clean the surface with a damp cloth.
  • Caesarstone Porcelain surfaces are highly resistant to scratches. However, we recommend cutting on a chopping board for daily use.
  • Do not allow direct contact with a naked flame.
  • Do not polish the surface with a polishing machine.
  • Take care to prevent hard knocks on exposed areas, particularly on edges, as this can cause breaks and chips.

Additional Guidance for Dark Surfaces

  • Dark surfaces are characteristically more prone to showing fingerprints, limescale and other signs of daily living than light surfaces. As such, some dark Porcelain models may need more frequent cleaning.
  • Dark Porcelain models, as all dark surfaces, tend to be more sensitive to scratch marks. It is therefore important to protect the surface from sharp objects.
  • Limescale is more visible on dark models than light models so liquid should be wiped up and not left to dry out on the surface.

8. Slab Warning Label


The warning label below is affixed to the back of each Caesarstone Porcelain slab.

503 Circa

Copyright © Caesarstone 2019 All Rights Reserved
The content included in this website is not the conclusive data available on the professional and health and safety issues that you should be familiar with and implement at your organization. Caesarstone does not make any warranty regarding the quality of the safety measures presented in this website or their sufficiency. Fabricators are fully responsible for the health and safety of their workers. Nothing included in this website may be considered as any kind of professional, medical, health, safety or legal advice; nor shall be regarded as an interpretation of any applicable law, regulation or standard; nor does it replace consultation with a health and safety professionals.